How to mix milk paint

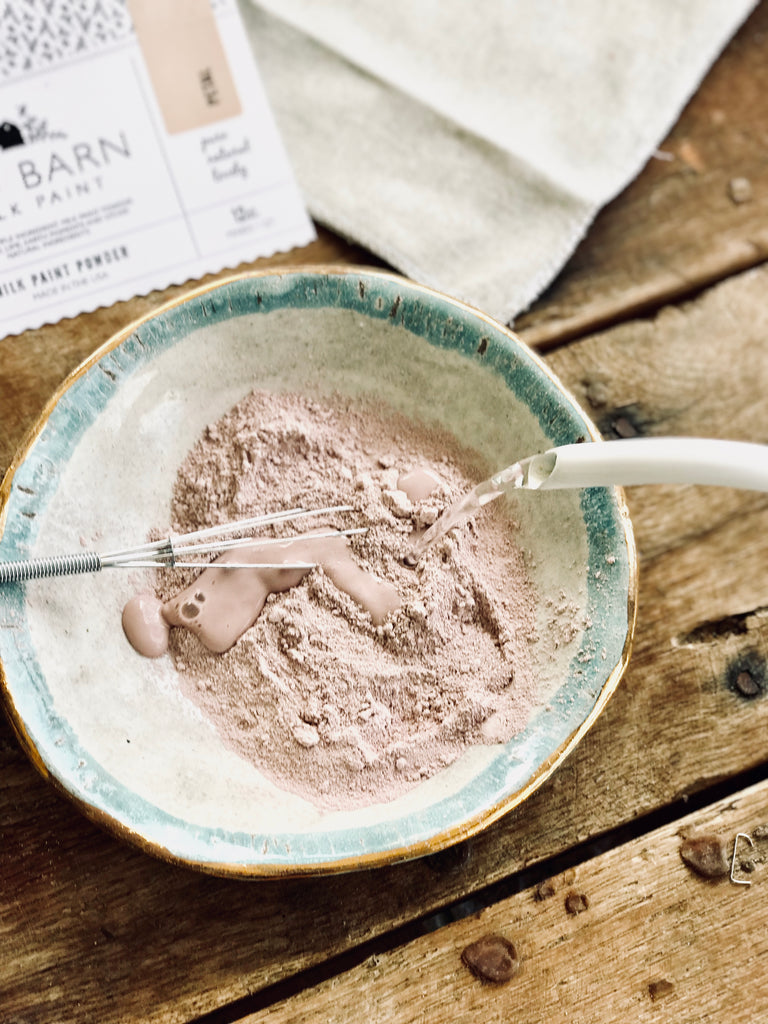

Hey friends! I thought I'd take a minute today to chat about mixing milk paint! It is so incredibly simple and easy!
Looking back on my first experience mixing milk paint, I was so focused on not messing up I took all the fun out of it! Like many first timers, I wasn't even sure what consistency it was supposed to be and I got myself all stressed out over something that is just not that complicated at all! If you can mix up a glass of chocolate milk, this is really no different. Just imagine mixing chocolate milk with cream, this is the consistency I prefer for my milk paint and honestly guys I don't even measure anything anymore!

We do have general directions to get you started; mix equal parts milk paint powder to water, this is a great recipe to get you started, but I have some tricks to help you on your way to becoming a milk paint dilettante! For starters, I always pour my mp powder in my mixing bowl first, then instead of dumping all of the suggested water in I pour just enough to cover the powder, (for those just starting out it may be helpful to imagine I'm using 1 cup of powder and have 1 cup of water) I then mix this up like a rue and slowly add water until I have a smooth, creamy mixture. Our mini whisks work wonders for this and create a super smooth consistency. We don't want lumps and clumps so always let your milk paint sit for about 10 minutes before using.

You probably know how impatient I am by now and are wondering seriously, Chrystal, you just sit there an watch the paint dissolve? Uh.. not so much, I use this time to prep my piece, because of my lack of patience I have figured out some great quick ways to prep furniture that don't take all day long. Some pieces you will need to spend adequate time on to get ready to accept the milk paint and look amazing when finished, for this post I'm just talking about those pieces that need a cleaning and possibly a quick sanding! I love to use simple green to clean my furniture because it cuts grease, tobacco smoke, and spills plus it dries quickly and I have a nice clean surface to paint on!

Ok, now that we have given all those clays and pigments time to dissolve give your mp a quick stir, it has probably thickened a bit as it's sat there and that's completely normal just add a splash of water, and for those of you who may have mixed it too thin before it may be just the right consistency now, Yay! Just a heads up, your first coat of milk paint may look pretty janky, you might think to yourself what is this?!! What did I do wrong, don't fret, this is totally normal. You second coat will provide much more coverage and you will fall in love I'm sure!

There are many applications you can use milk paint for, the above is for general painting. If you want to learn how to mix milk paint to a stain, wash, or fabric dye, keep reading! I am still awed by the many different uses for this one amazing paint!
Mixing for stain: stains have to absorb into a porous surface, I mix no more than 3 parts water to 1 part milk paint powder. Let's say 2.5 cups of water over 1 cup of milk paint. Mix this up and allow the usual 10 minutes or so for everything to dissolve and check your consistency. This mixture should be a bit watery maybe like low fat milk. I don't know why all the dairy references when I'm talking about mixing and consistency, I don't cook, so I don't have many references there... we are all lucky I married a chef because I'm sure we'd all starve or survive off Door Dash! I can pour a mean bowl of cereal and make some great chocolate milk though!
With this stain mixture you can easily deepen the color by apply additional coats until you achieve the desired depth you are looking for.
Mixing a wash: Washes are great for a subtle hint of color over a darker shade, over wood, and also for a glaze. To create a wash I generally mix 2 parts water to 1 part milk paint powder. This creates a thin mixture that you can easily apply and get transparent "washed" look.
Mixing a DYE: If you haven't read about our Macrame + Milk Paint workshop we did at Anthropologie I'll link it here because this was one of the most fun ideas I've ever had and if you're reading this far you will probably enjoy it too! I played around with the idea of using milk paint for a dye after I painted my little black dresser. I used a wet distress technique on it and it completely dyed my cloth this gorgeous black color. The fabric had the same gorgeous velvety look that milk paint creates on furniture and I just knew I had to experiment. I figured out that about a cup of milk paint powder and about 4-5 cups of water would create a pretty decent dye. You can control the intensity of the color by adding more water and/or shortening the amount of time you let your fabric sit in the dye. I have not dyed large pieces of fabric in buckets and allowed them to sit so I don't have answers on how long to let the fabric sit in the dye. I have applied the dye with a paint brush and brushed it on applying additional coats to deepen the color if wanted. When we did the macrame workshop we dipped the ends in the dye and allowed it to soak for a short time and wrung out the excess liquid. When mixed properly this dye will not harden fabric and will maintain the texture of your original undyed material.
I am so happy to have shared this information with you. If you have any questions please leave them below in the comments!
Comments on this post (4)
The table I am painting has had all the paint chip off twice. I’ve sanded it down and repainted with the milk paint, following instructions and it just keeps chipping away and does not look good. What am I missing?
— Chloe
This is my first time using milk paint and there is nothing on how you need to prep the piece you’re working on. I just need to know what kind of state the wood should be in. Does the clear finish need to be stripped?
— Katelyn
Is there a certain temperature my piece should be in to paint it and let it dry? I’d like to do it in my garage but we live in East Alabama and its in the 90s everyday.
— Meaghan Szczecina
I’m a first time user (you come highly recommended by @Houseonwinchester) and I’m trying to make my mirror look chippy so I understand that I want to take a putty knife and knock some paint off but do I put anything on top to seal it?
— Bree